Christmas PFP
Cats
Christmas Cat PFPs with Clear Ears and Whiskers
Choose your own cat photo, leave room for a mini Santa hat, and check ears, whiskers and markings before saving a Christmas cat profile picture.
A miniature Santa hat needs a little space between your cat's ears. Start with a photo that already shows the ear tips and the whiskers around the muzzle. Keep that original available while you check the finished Christmas cat PFP.
The paired pictures in this guide are AI-created design examples of a fictional ginger-and-white cat. They show a possible hat placement and details worth inspecting. They are not a test of an upload to this website or a promise that AI will preserve every strand of fur.
Choose a photo with room beside the face
Use a sharp picture of one cat, with the head and upper chest visible. A front-facing view makes the two ears and both sides of the muzzle easy to inspect. A slight turn can work, but judge the result against that same angle. An ear partly hidden in the source cannot serve as a clear reference for the whole ear.
Check the edges before checking the expression. If an ear tip already touches the top border, choose a looser photo or prepare a different crop before uploading. Leave space on both sides for the longest visible whiskers. Adding a hat will not make a tightly cropped source a reliable record of those missing details.
Soft, even light helps you see the fur and eyes without a bright patch covering them. Look at the original at a larger size. If the muzzle is blurred or its fine white hairs disappear into a pale background, another photograph may give you a clearer comparison.
Keep any distinctive markings in view. The white area around a nose, a patch beside an eye or a familiar collar can help you decide whether the picture still looks like your own cat.
Fit a mini Santa hat between the ears
For a cat Santa hat PFP, choose My pet → Santa hat only in the studio for a small accessory in the existing setting. Its instructions aim for a brim about one third of the head's width, with the hat between upright ears or slightly to one side. That is the intended treatment, so inspect the actual result rather than expecting an exact measured size.
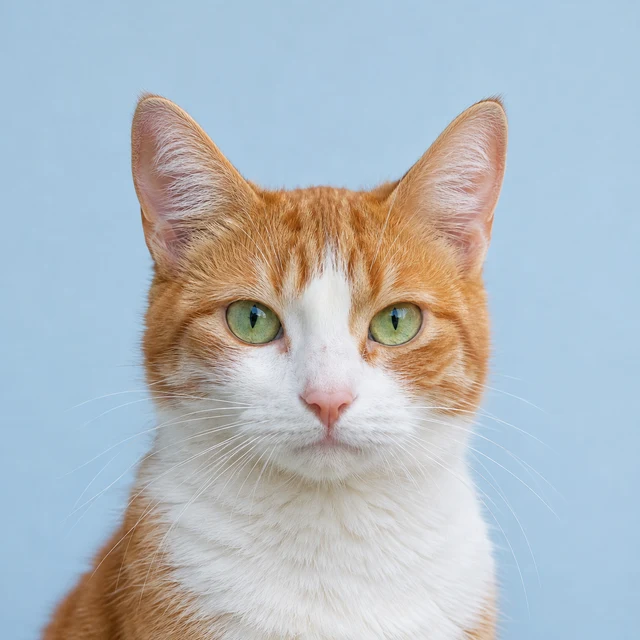
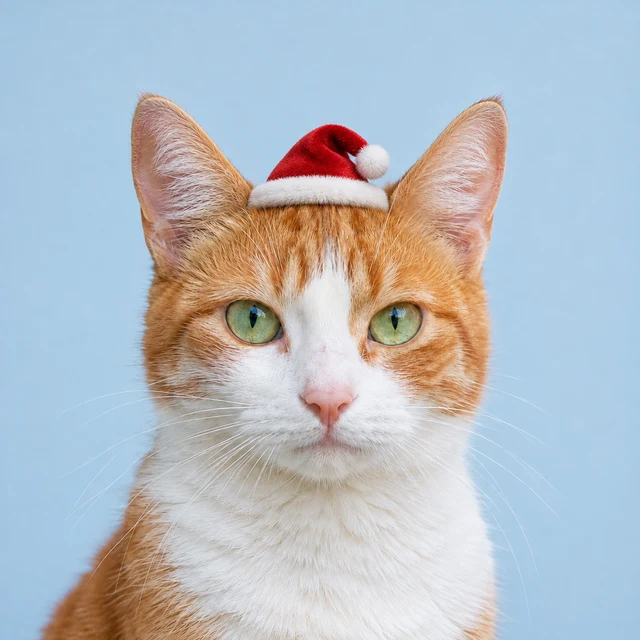
In this design example, the small red hat leaves the ear outlines available to inspect. Compare that placement with your own result. The brim should sit above the eyes, and the accessory should have a believable place to rest on the forehead.
Santa hat only in Pet mode aims to keep the original scene, lighting and markings while adding the accessory. AI can still change those details. The Santa hat photo guide covers the broader face and hat checks if you are choosing a source for the first time.
Inspect the ears, muzzle and markings up close

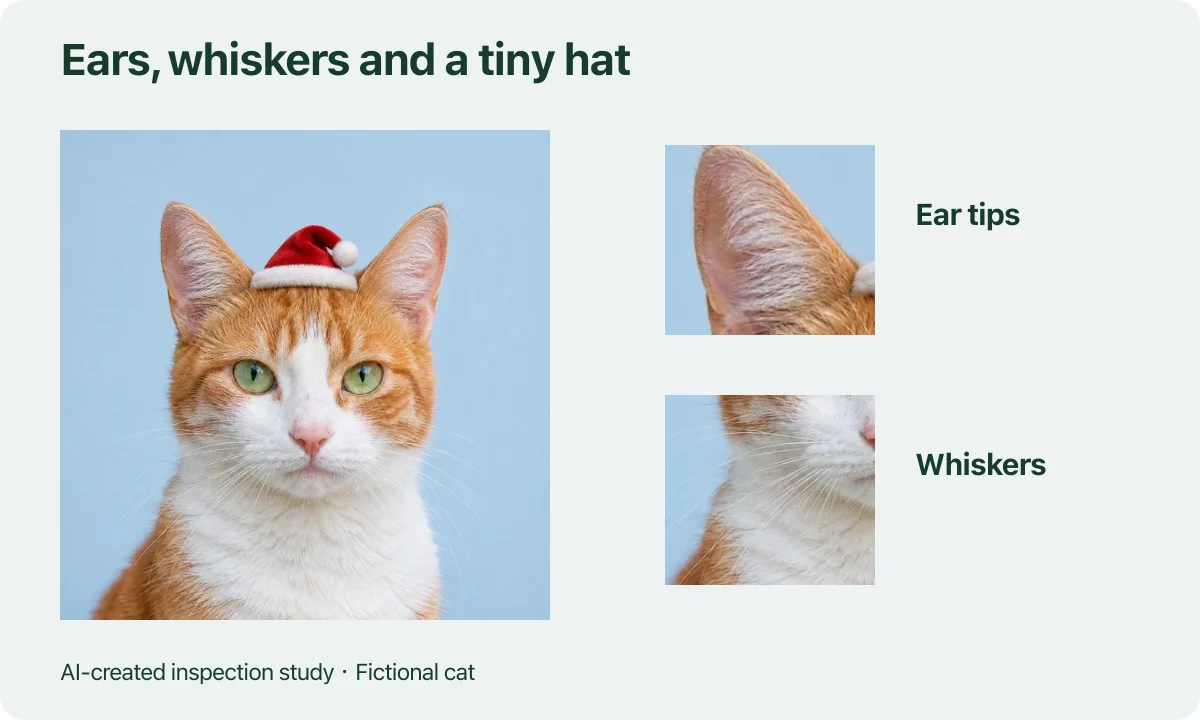
Inspection diagram using the fictional hat-placement example. The callouts identify areas to compare with your original.
Open the source and finished picture at similar sizes. Follow each ear from its base to the tip. Look for an accessory covering an edge, an ear with a different outline or fur that has merged into the hat trim. Check both ears individually, including the one farther from the camera in an angled photo.
Then look around the nose and cheeks. Fine whiskers can be hard to judge in a small preview. Inspect their visible direction and the shape of the muzzle at a larger size, without treating this illustration as a whisker-count standard. If a line looks doubled or unusually thick, compare it with the source before keeping the image.
Finally, compare the eyes and recognizable patches of fur. In our illustration, the white bridge above the pink nose gives you a specific shape to follow. Find a similarly familiar detail in your own source. A shifted white patch may matter more to you than a slightly different fold in the hat.
Check the cat at the size you will use
Shrink the picture after the close inspection. At avatar size, the ear silhouette, eyes and red hat should be easy to pick out. Every fine whisker does not need to remain individually visible in the thumbnail, but the muzzle should still have a clear outline.
Try the circular view as well. The top corners of a square can hold details that a circle hides. Watch the ear tips and the pompom, especially when the original photo was framed closely. If you want a quieter image around the face, begin with a less crowded source rather than assuming the studio can erase particular objects.
The circle crop guide shows how a round boundary crosses upright ear tips even when both ears fit inside a square.
Generate one picture, then review it
Christmas PFP accepts JPG, PNG and WebP uploads within the 10 MB limit. Sign in, choose your cat photo and confirm My pet → Santa hat only before generating. One generation uses 5 credits. A failed attempt returns its credits; requesting another successful version uses another 5 credits.
The one-time pack costs $5.99 for 100 credits, before applicable tax. Check the first result against the source before making more options. The pet profile picture guide helps with the wider choice of pet photo and festive treatment.
For a dog, the pointed and floppy ear photo guide compares the space above the tips with the room hanging ears need beside the cheeks.
Save a square copy before choosing a circle
Keep a square PNG as your master copy. The current studio also offers Download circle PNG, which makes the area outside the circle transparent. Choose the shape you need, then inspect the saved file and the destination app's own preview.
When a hat or ear is missing from the square image, prepare a more loosely framed source before making another picture. A preview mask cannot restore absent image detail.
Start with a pet Santa hat when your cat photo has the room you want to keep.
If your cat portrait is becoming a WhatsApp DP, the Christmas WhatsApp photo guide covers the documented upload route and reviewing who can see the profile picture.